In today’s fast paced world where no one has time to go and buy groceries from the local Kirana shops, Blinkit has emerged as one of the platforms that has utilized this to their advantage. With promise of delivering products to your doorsteps in minutes, it has been a go to app for purchase.
With the capability to deliver the products at lightening speed, Blinkit now has around 2 crore active users across 35 cities.
And this user base has attracted brands that want visibility and growth.
Now the question arises.
Why do brands choose Blinkit?
- To Attract customers – 20M+ active users every month, with over 116M+ keyword searches
- Leverage Quick commerce – To be a part of fastest growing segment with high potential growth
- Results that matter – To get data support and detailed performance reports for each campaign
- Easy campaigns creation – Campaign process on Blinkit is very simple for advertisers for any level of marketing expertise
- Optimize ad spending – From prompting the right keywords, to choosing the correct ad placements and formats that will help your ads stand out
- To get Increased sales – They can increase sales conversions by driving customers to easily find and purchase their brand’s products
How to onboard Blinkit?
There are 4 different opportunities to grow on Blinkit
- Partner store – Run mini-warehouses (partner stores) for Blinkit. You can operate a dark store in your neighborhood, delivering essentials to doorsteps. Click to know more.
- Rent your property – Your property can become the Blinkit store. You can transform your property into a quick commerce hub. Click to know more.
- Seller – List your products on Blinkit and reach your customers in minutes. Click to know more.
- Deliver – Deliver items from a Blinkit partner store to customers. You can become a delivery partner on your own schedule. Click to know more.
List of requisites to onboard on Blinkit.
Mandatory Documents:
- GST Registration: GST certificate, as it verifies your business’s tax compliance.
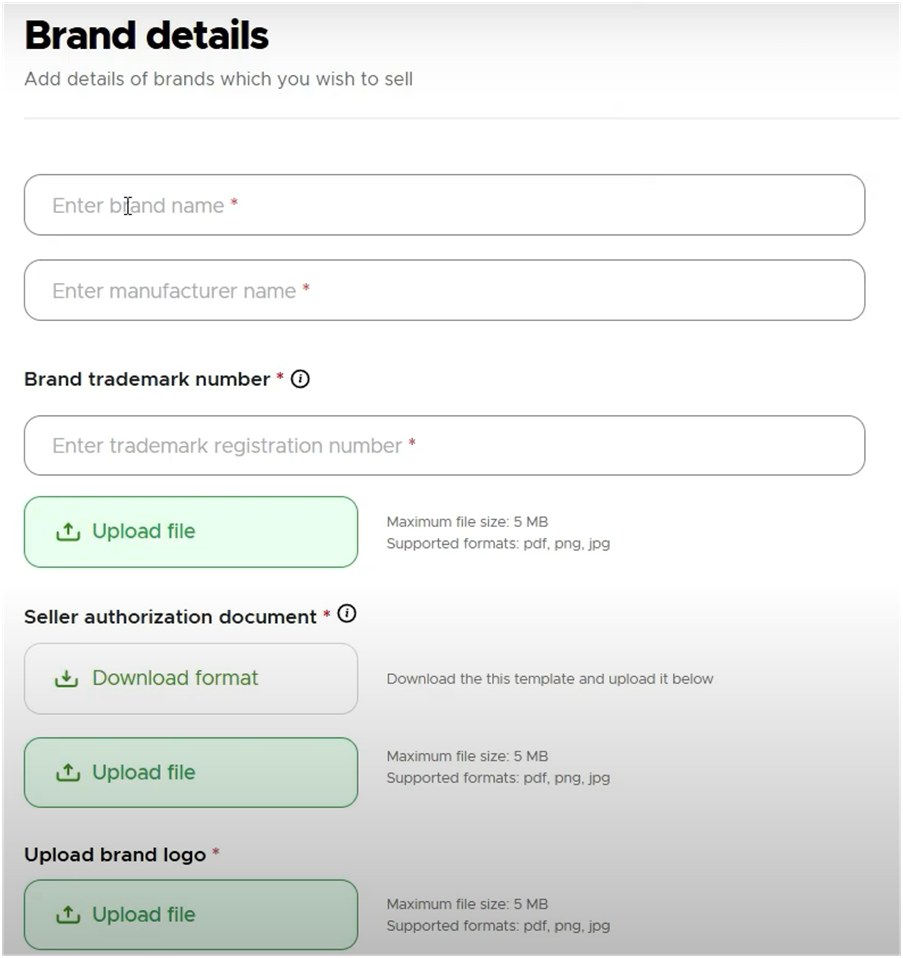
- Brand Documents: Trademark certificate, Seller authorization document and Brand logo.
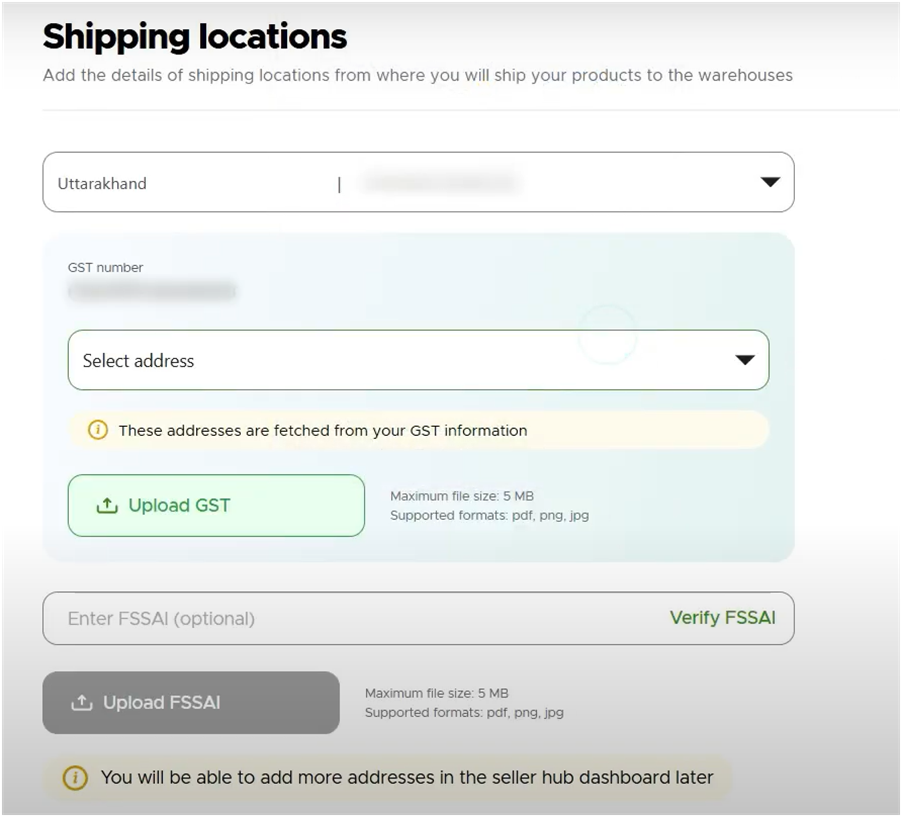
- FSSAI License: Required for businesses selling food products.
- PAN Card: For both individual and business registrations.
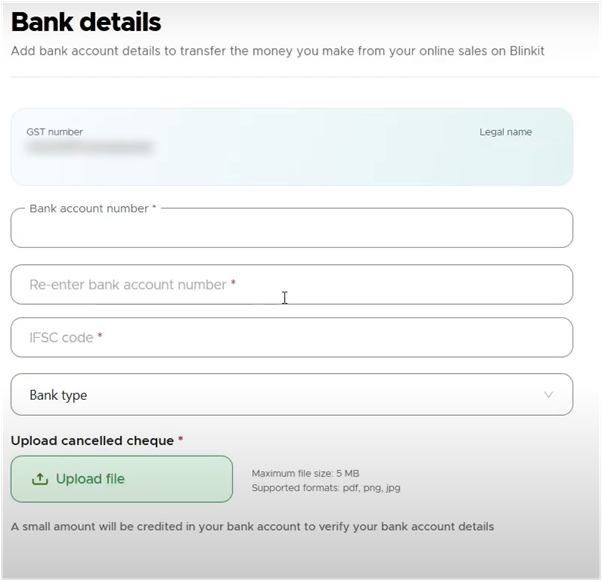
- Business Bank Account Details: For payment processing.
Other Required Information:
- Business Name and Address: This ensures your business is properly identified and can be contacted.
- Product Inventory: You’ll need to provide details about the products you’ll sell, including categories, images, and descriptions.
- Logistics Information: If applicable, you may need to provide details about how you will fulfill orders.
Steps for Seller onboarding on Blinkit
Follow the following steps to successfully onboard as a seller-
Step 1 – Go to https://seller.blinkit.com/ , click on “Sell on Blinkit”, enter your official email ID and enter OTP received. You will then be redirected to an onboarding page where you will have to fill in the required details.
Step 2 – Enter Business details – Under this, you will have to provide – Category & sales details
Add the top categories in which you sell your products (Upto 10), the retail channels you sell (like Amazon, Flipkart etc) or you can select “You don’t wish to share”, the social channels you sell on (Instagram, Youtube) or you can select “You don’t wish to share”.
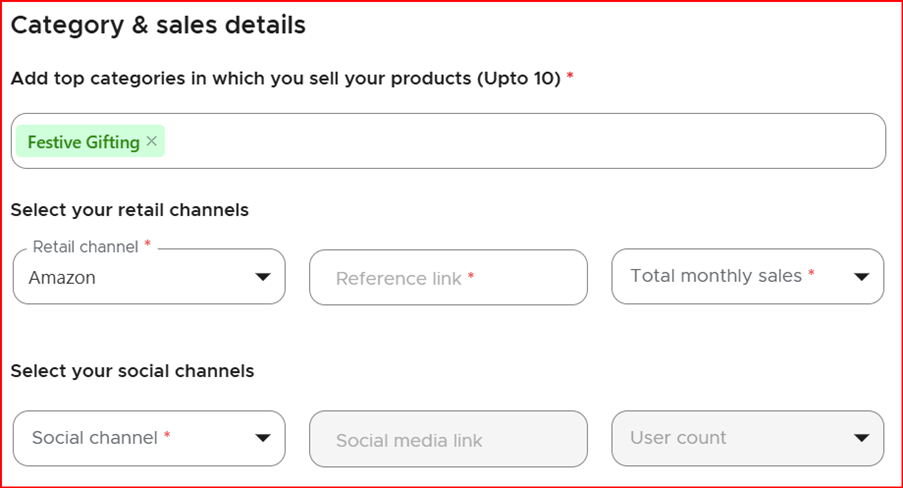
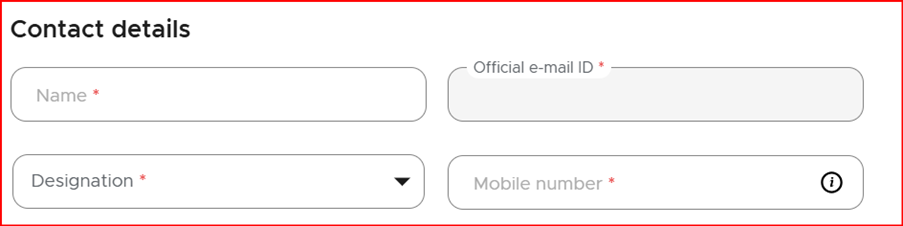
Finally, enter contact information.
Step 3 – Enter Seller Details by adding GST no and verify.
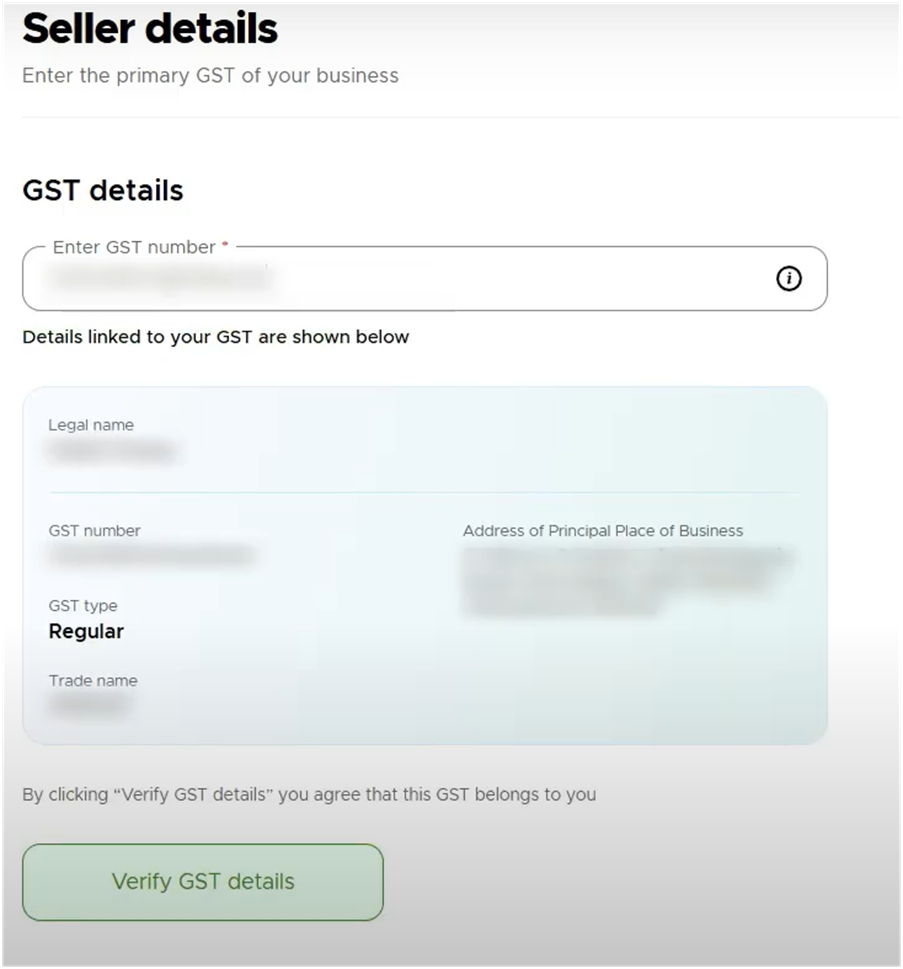
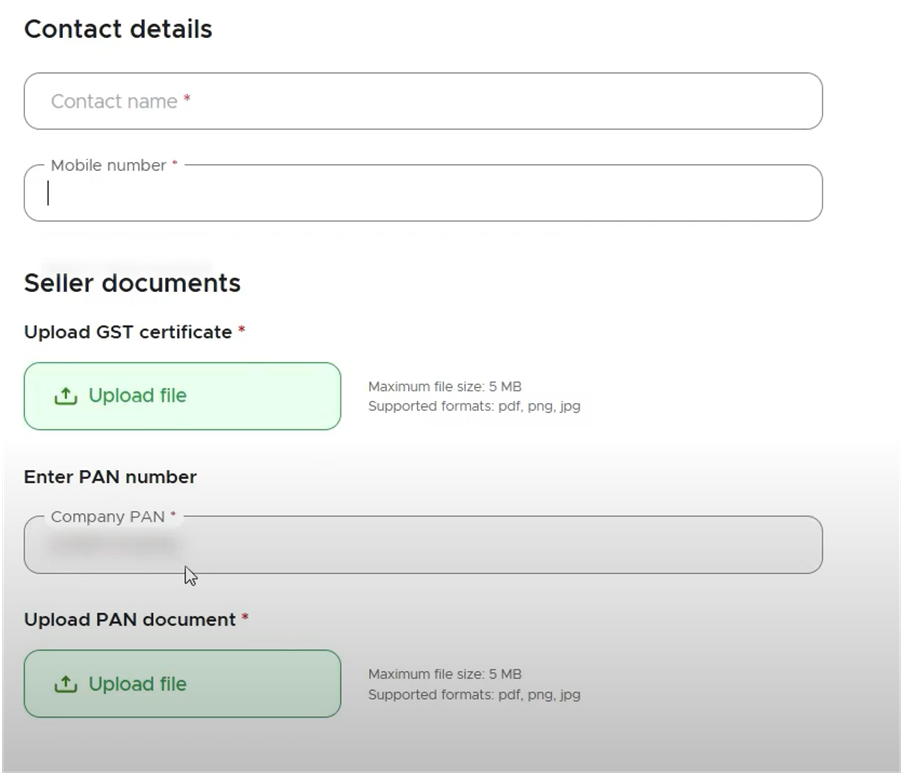
After verifying the GST, you have to fill contact details, PAN details and upload GST certificate.
Step 4 – In this step you have to provide Brand details.
Step 5 – In this step you have to provide bank details.
Step 6 – In this step you have to provide shipping details
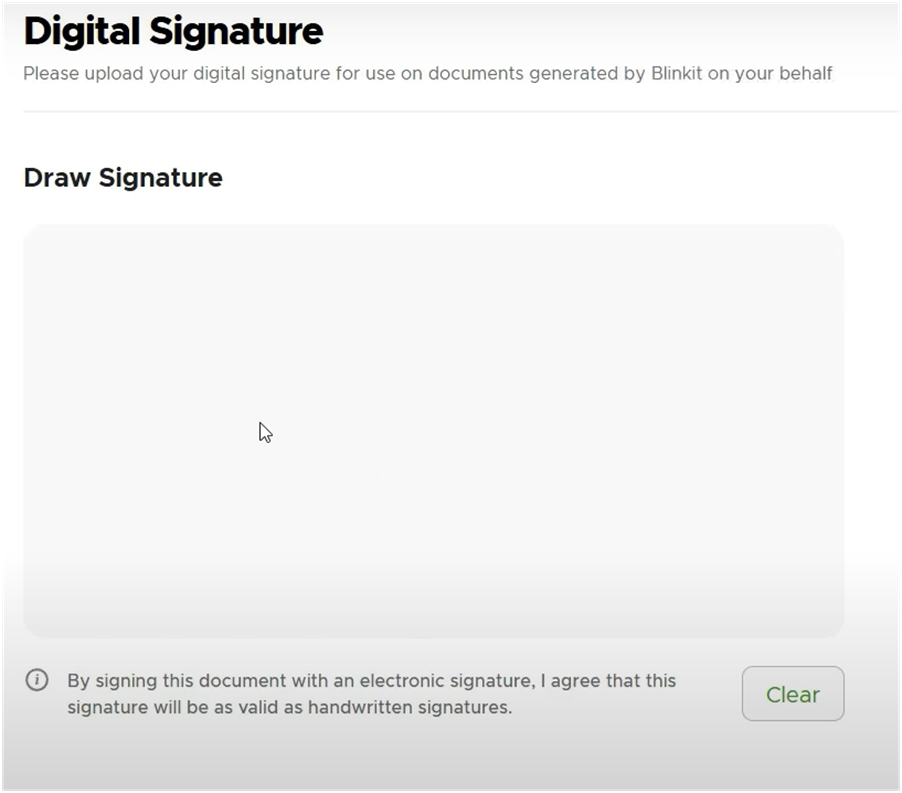
Step 7 – Here, you will have to provide or draw a digital signature.
Step 8 – This is last step, wherein you have to verify all the information that you have entered and submit.
After submitting you will be provided with an acknowledgement and a reference ID, and the application will go under review. The review process takes around 30 days.
To learn, about how to run Blinkit ads, check this blog.
Pingback: All about Blinkit Ads Asset in 1 blog - Harshit Maggo